The steps here are for sending individual e-invoice. For self bill e-invoice or consolidated e-invoice, please refer to Xero guide below.
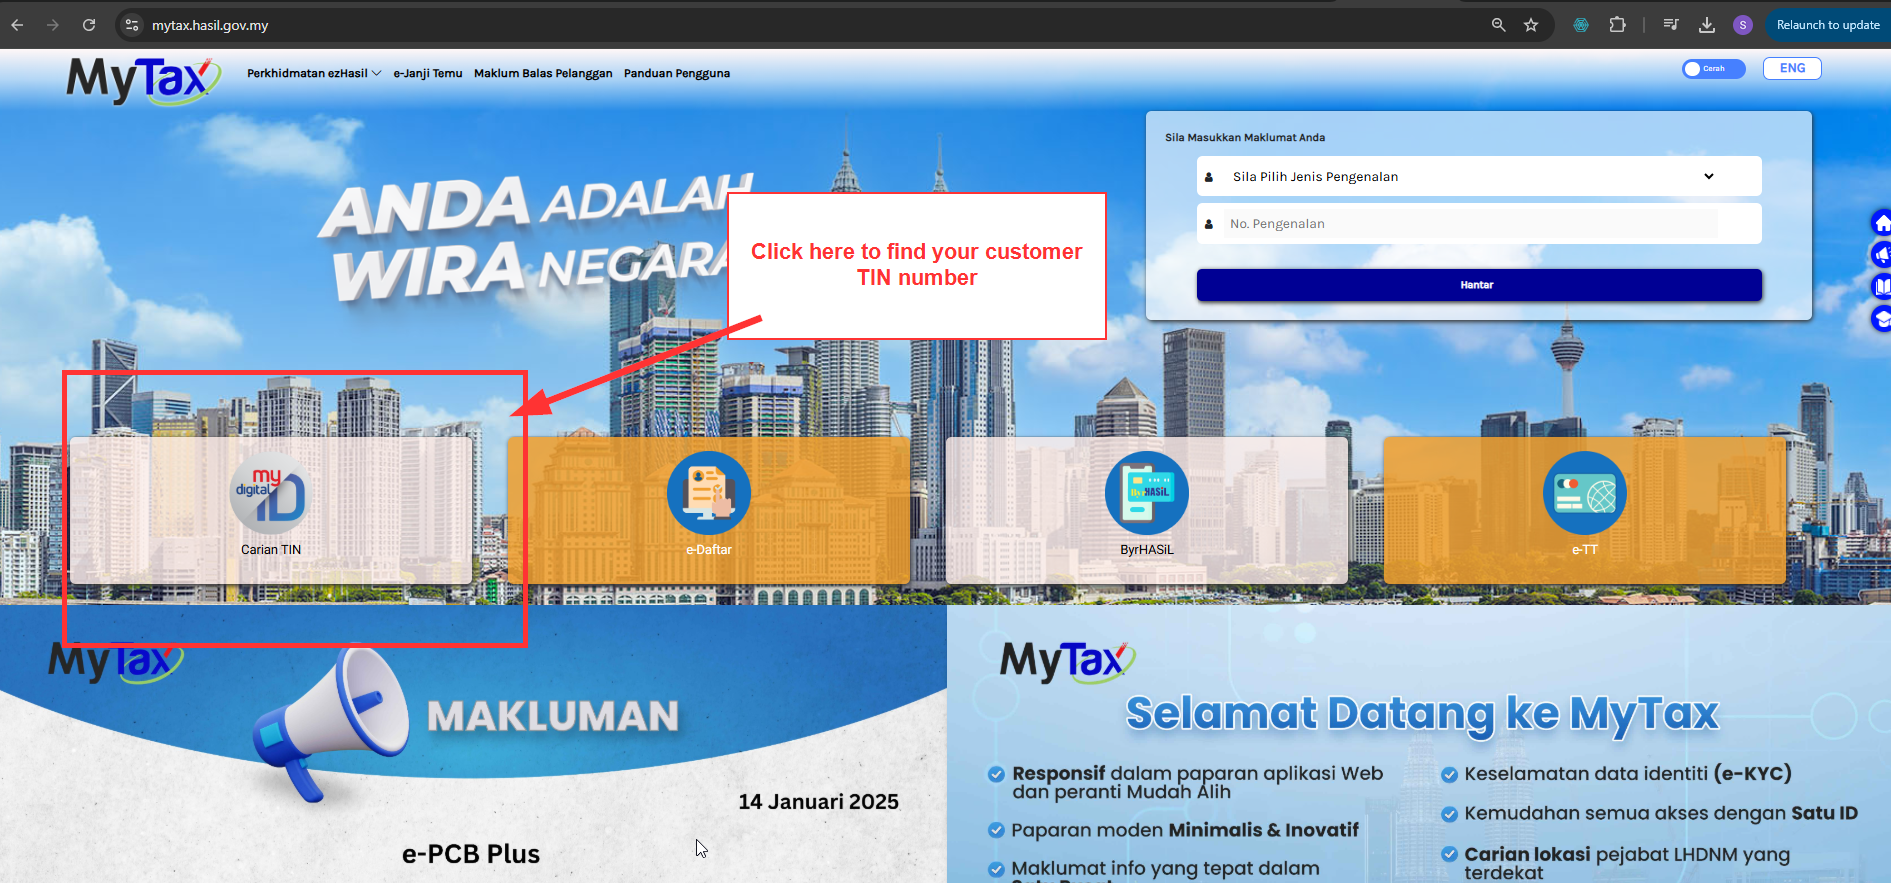
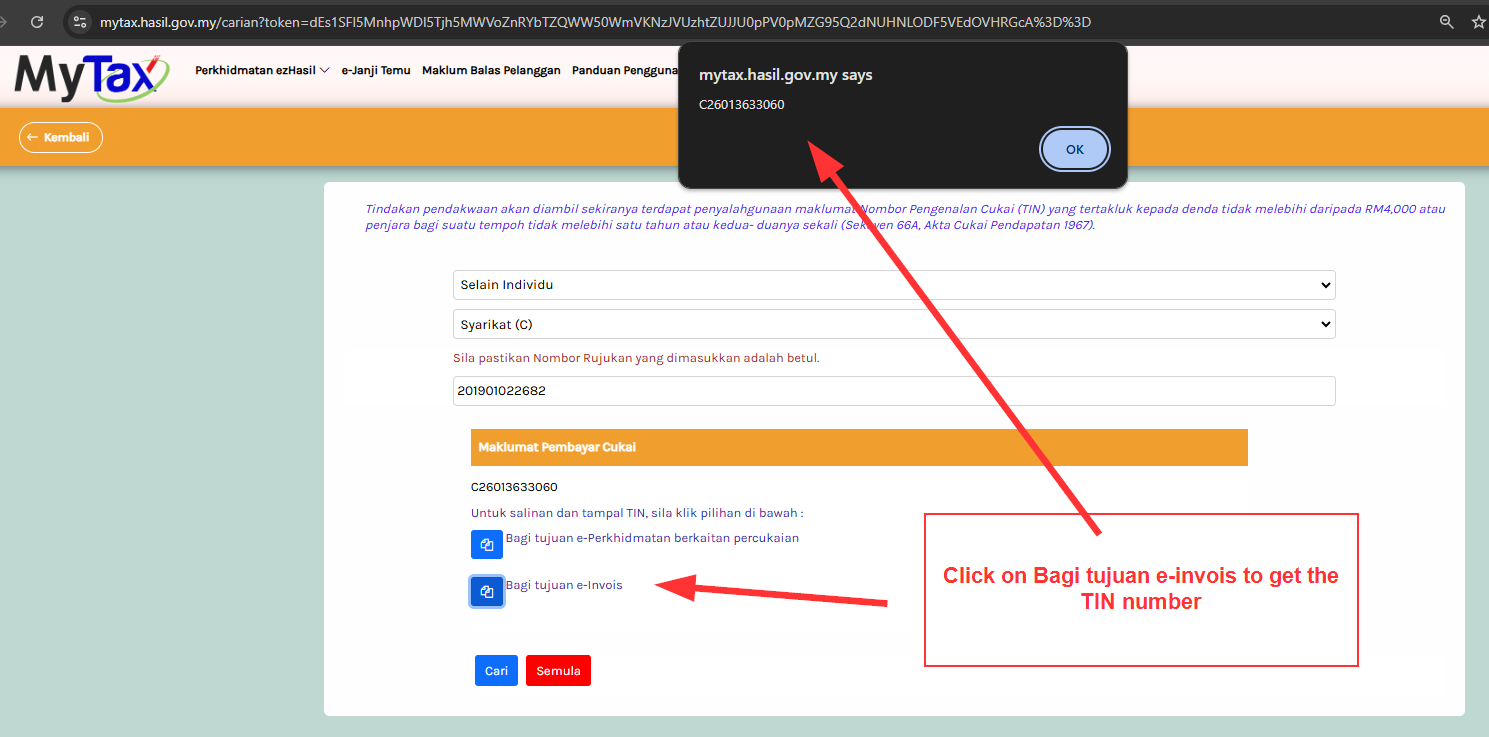
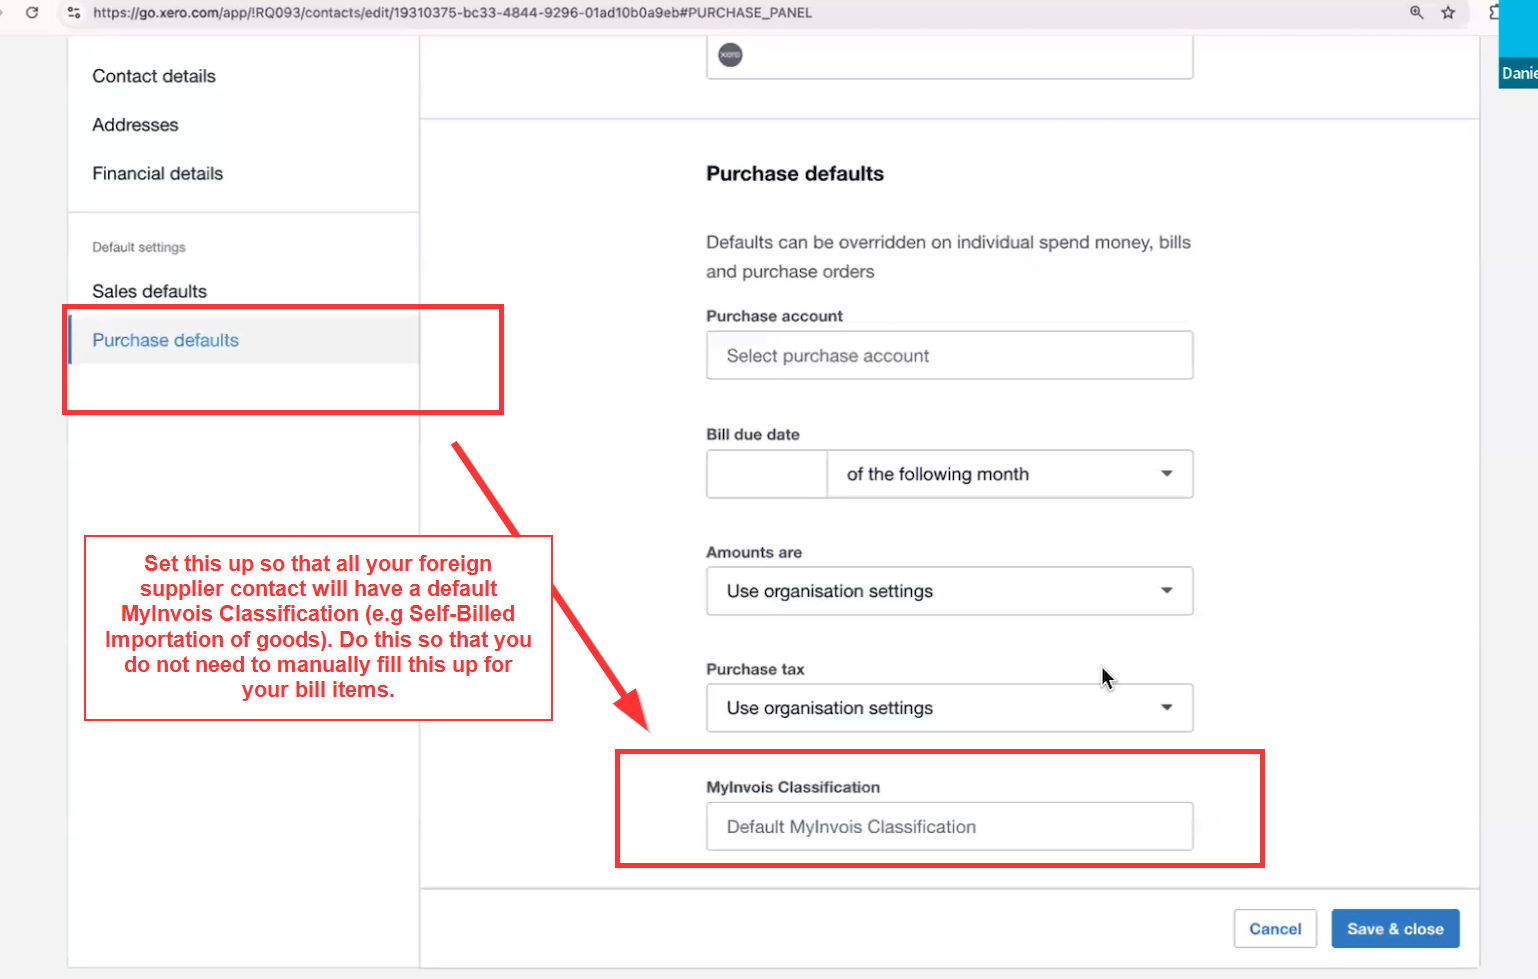
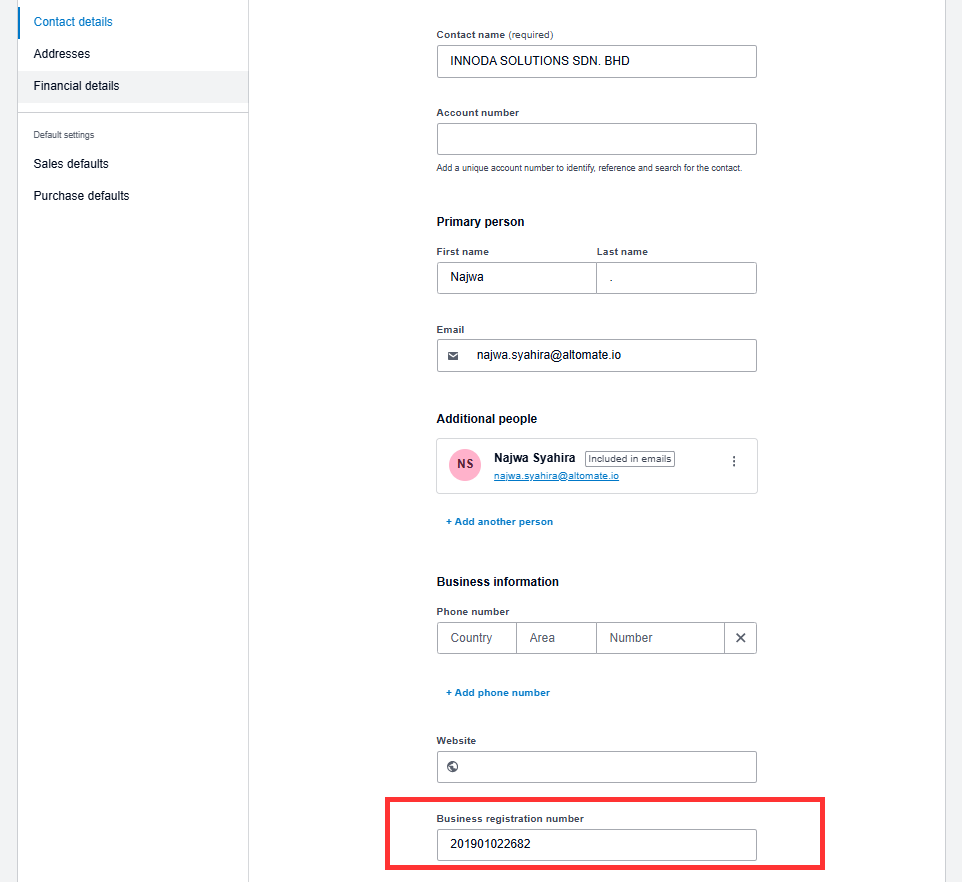
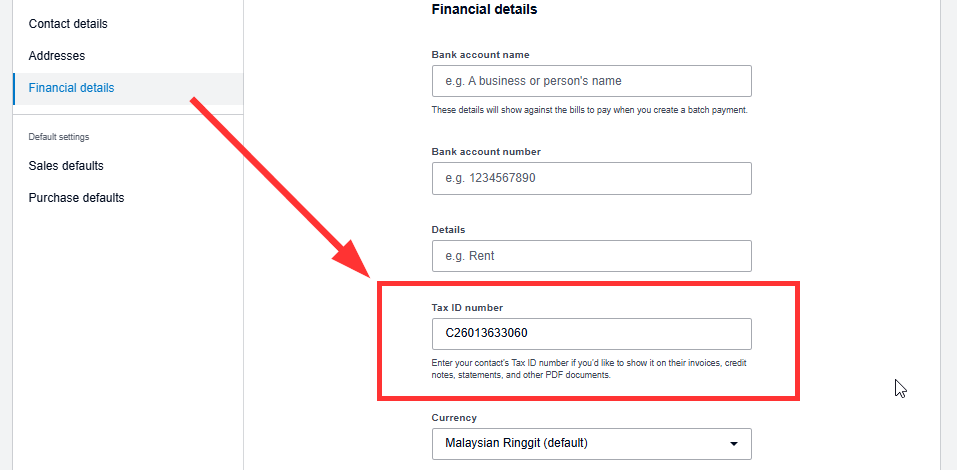
Once you have the BRN and TIN of your client you want to e-invoice, fill up the info in Xero contact.
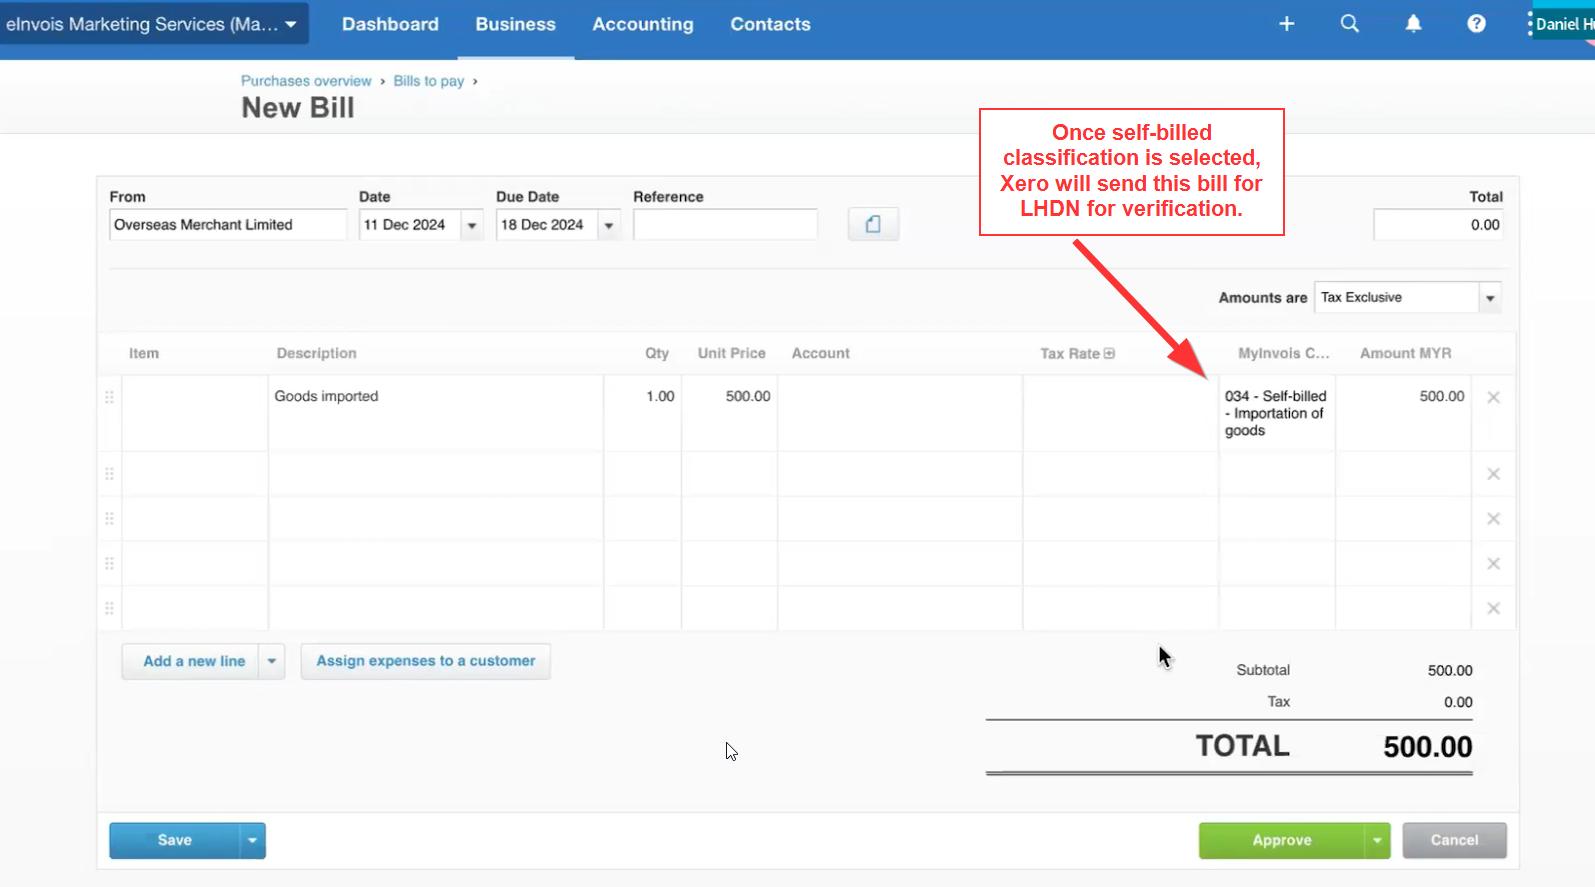
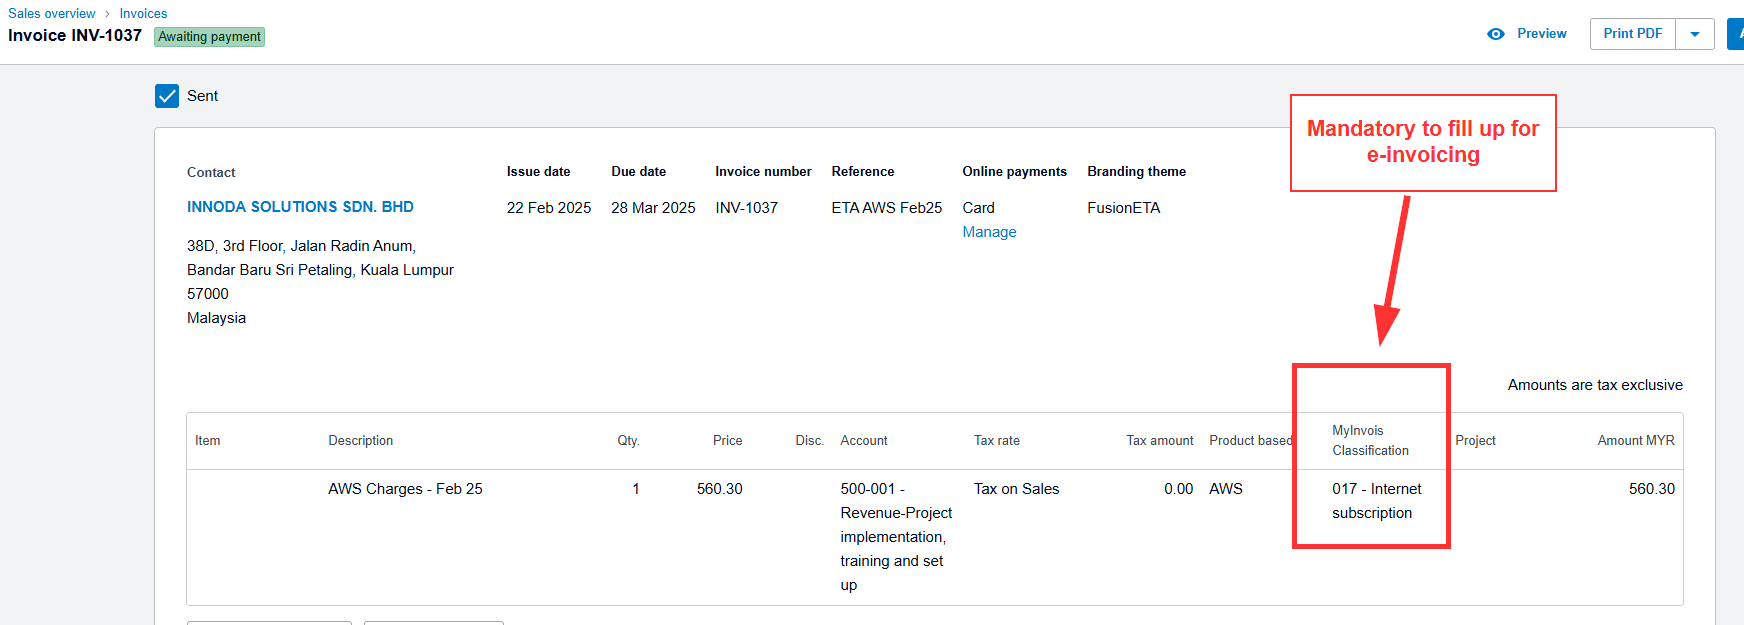
Once your contact is properly fill up, create invoice in Xero and ensure that the MyInvois classification is fill up accordingly.
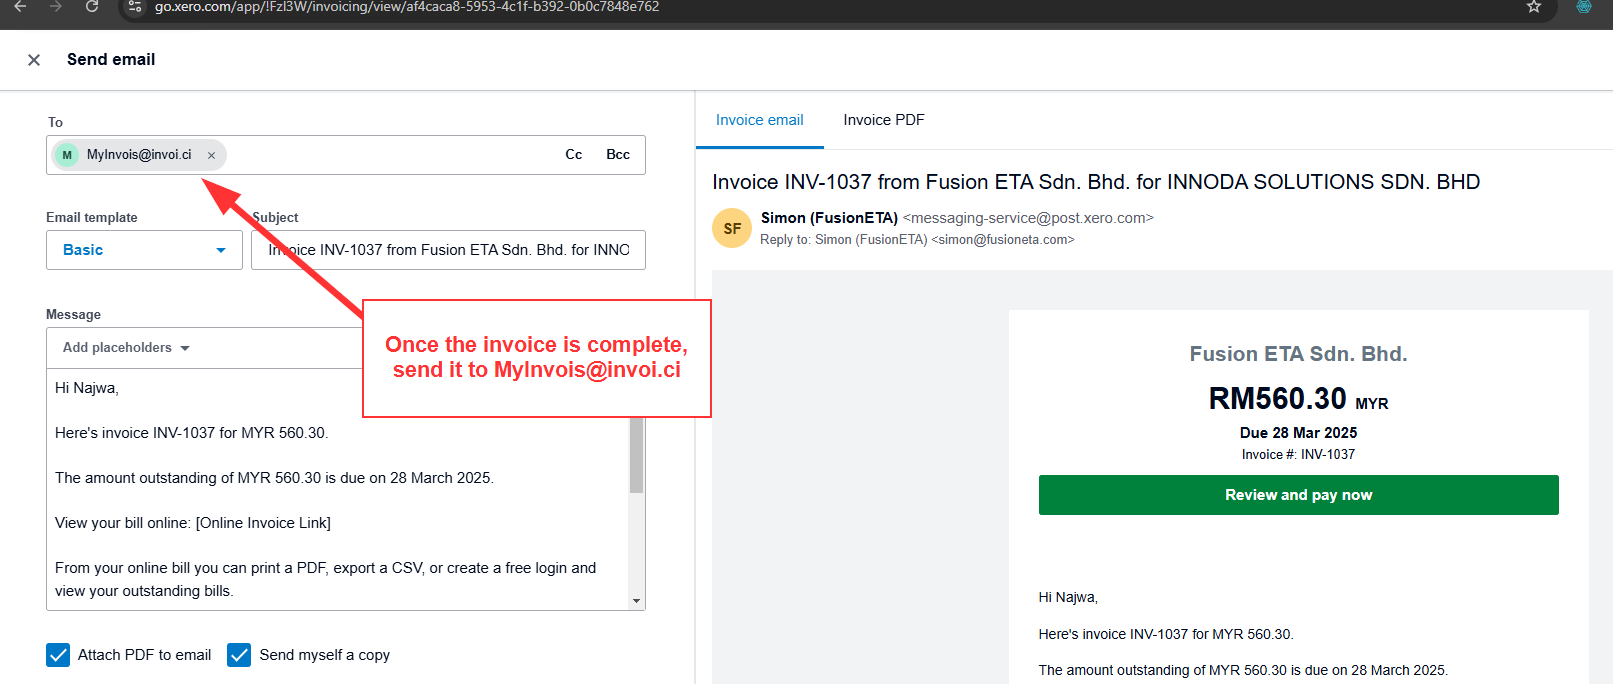
Approve and send the invoice to invoici.
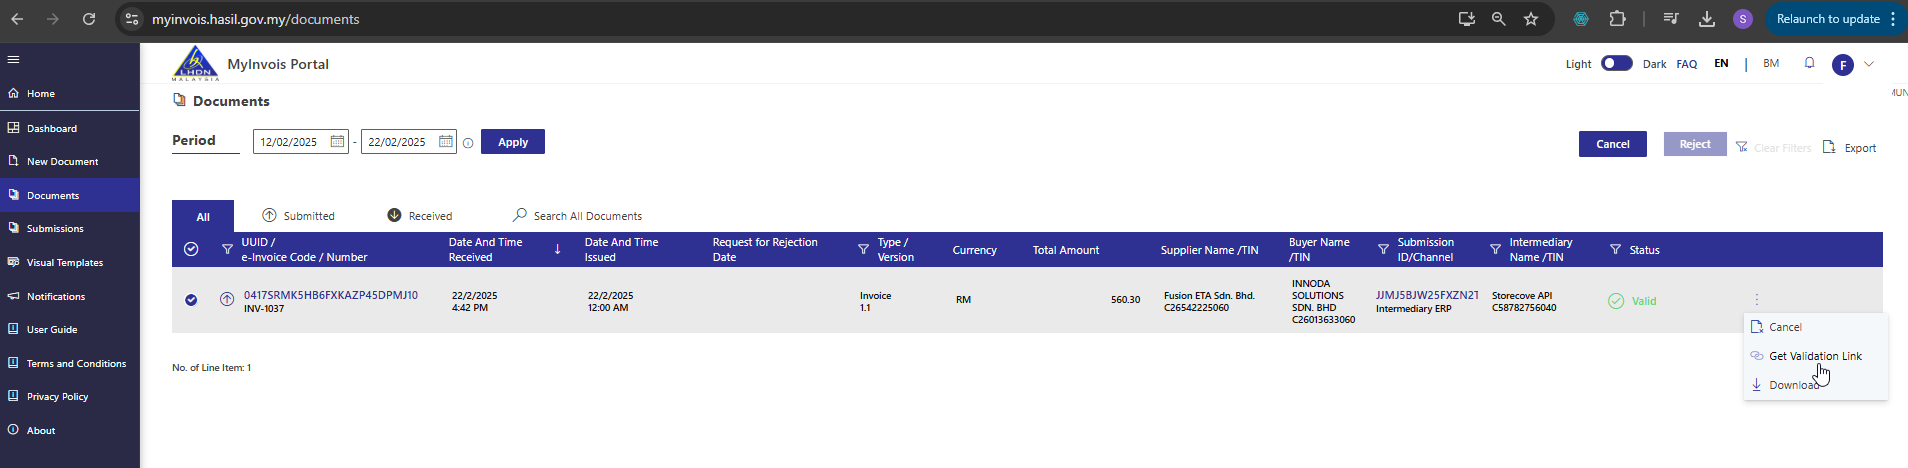
Once invoice is approved and email to invoici, your invoice will appear in MyInvois portal immediately. Login and perform a search and you will see the invoice in MyInvois.
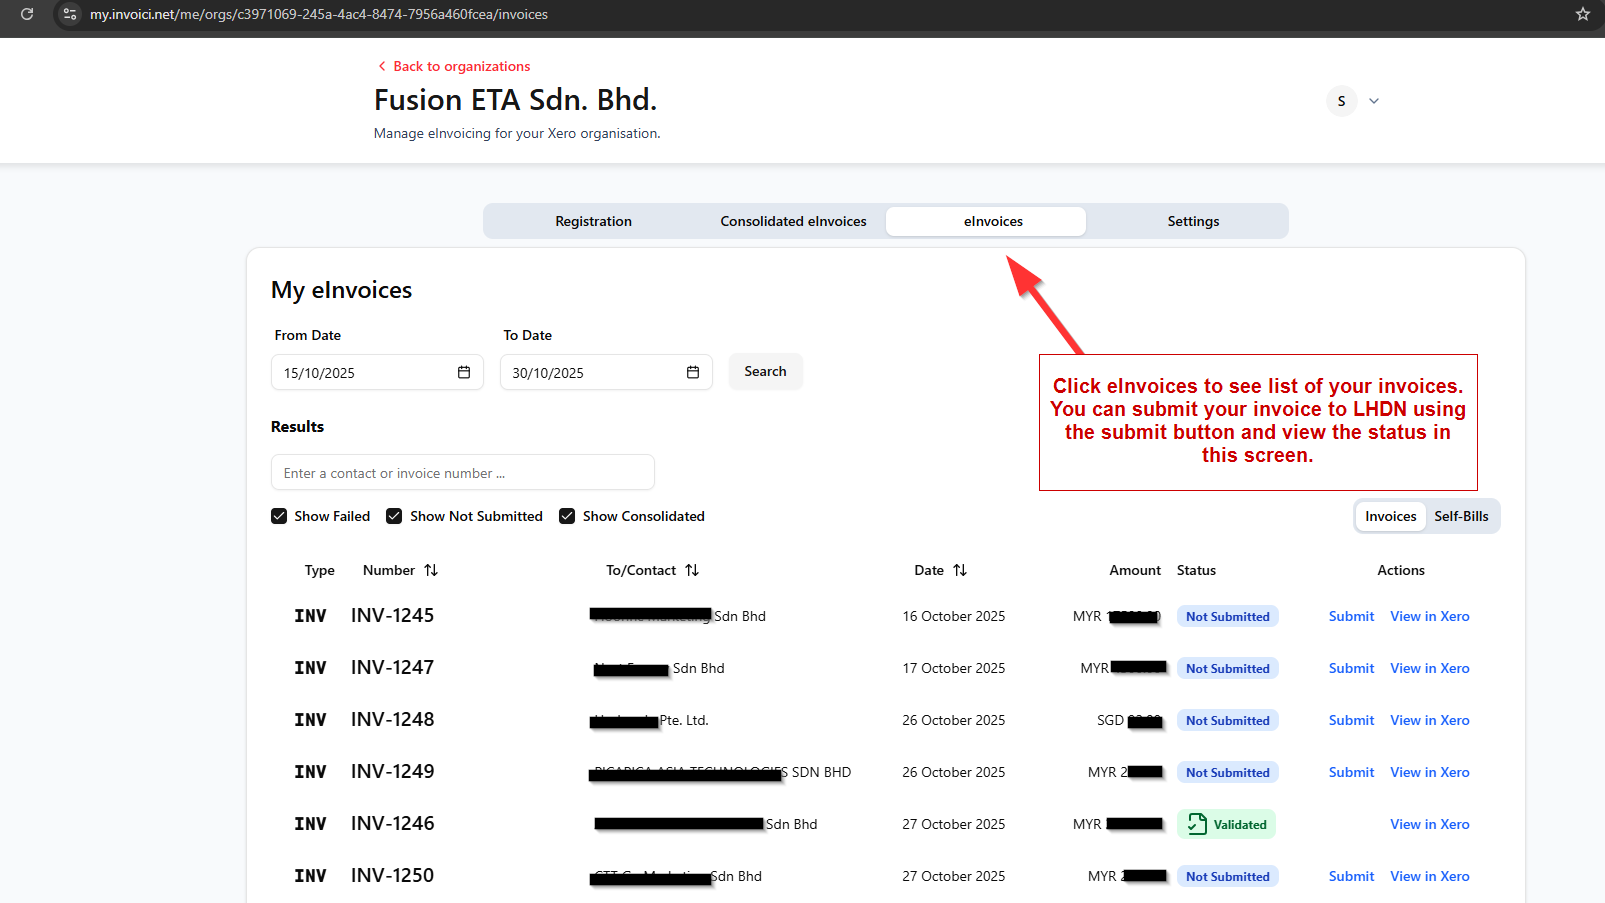
New capability in https://my.invoici.net to allow you to submit invoice to LHDN through a listing view. You can also use this view to track submission status and completeness.
Creating Self-Bill e-Invoice in Xero